In order to setup a forward you will want to make sure you
log into your web hosting control panel
Create Email Forward
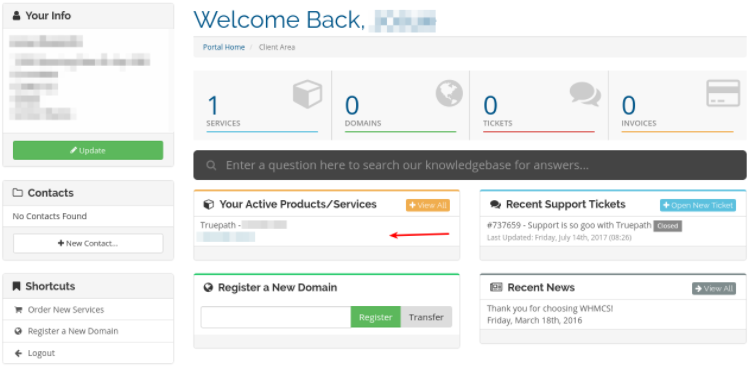
Upon login, locate the section labeled Your Active Products/Services(highlighted in image below). Click on the service, not the actual domain name, and it will launch the next page.
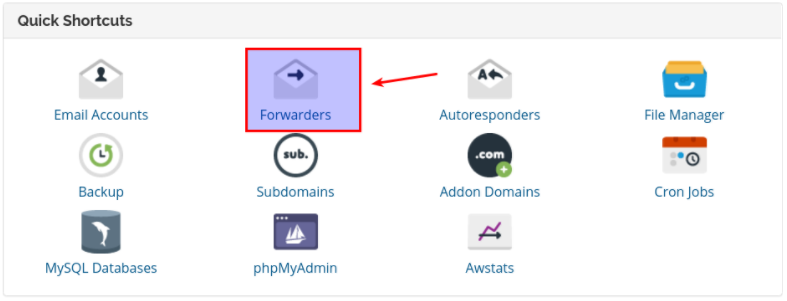
Scroll down to the Quick Shortcuts section. Click on the Email Forwarders tab under the Manage Account section. See image below.
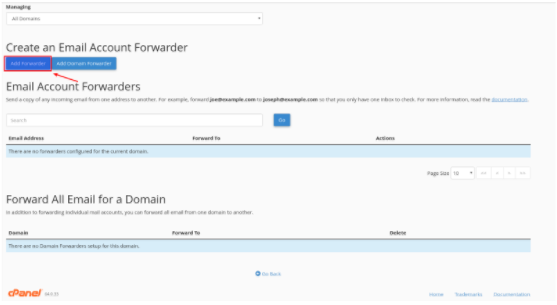
This will launch another tab in your browser with Forwarders at the top of the screen. Select add forwarder. See image below.
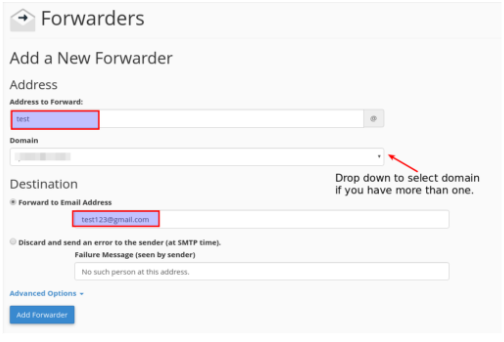
This will take you to the next screen. Input the address you wish to forward, the domain it is tied to ( if you have several domains) and the destination address. Then select “Add Forwarder”.
Your email forward is now set up.