Add User to Database
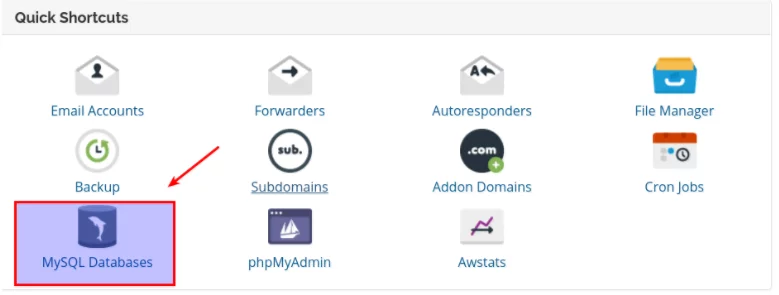
In order to create a MySQL Database you will want to make sure you log into your web hosting control panel.
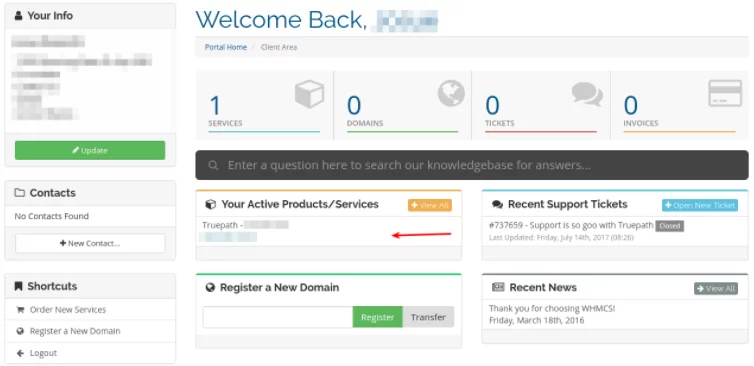
1. Upon login, locate the section labeled Your Active Products/Services(highlighted in image below). Click on the service, not the actual domain name, and it will launch the next page.
2. Scroll down to the Quick Shortcuts section. Click on the MySQL Databases under the Manage Account section. See image below.
3. This will launch a second tab and you should see MySQL Users. You will need to type in a Username and password to create the user. You can use the Password Generator to create a secure password if needed. See the image below.
4. On the next page, you should see a success message. Select Go Back.
5. The page should have a section titled “Add User To Database” with a drop down menu. Under User select the user you want to add and then under Database select the database you wish to add this user to. See the image below.
6. The next screen is the “Manage User Privileges” menu. On the very top select “All Privileges”. Once this is done select the “Make Changes” button.
7. Once this is done you should see a success message in green in the upper right corner of your screen. This means you have successfully added the user to the database.